How to create a Neon database backup


Nour Sofanati
Developer, SimpleBackups
March 20, 2024
In this Guide, we will go through creating a backup of your Neon PostgreSQL database using SimpleBackups. We'll cover everything from obtaining your Neon database credentials to creating and restoring backups. By following these steps, you can ensure the safety and security of your valuable data.
Prerequisites:
- Register for a SimpleBackups account, this tutorial uses SimpleBackups as a backup provider.
- An active Neon account with a database to backup
- Network Access from SimpleBackups to your Neon database
Retrieving Neon Database Connection String
Step 1: Create a Backup User in Neon
- Log in to your Neon dashboard.
- Navigate to the database you wish to back up.
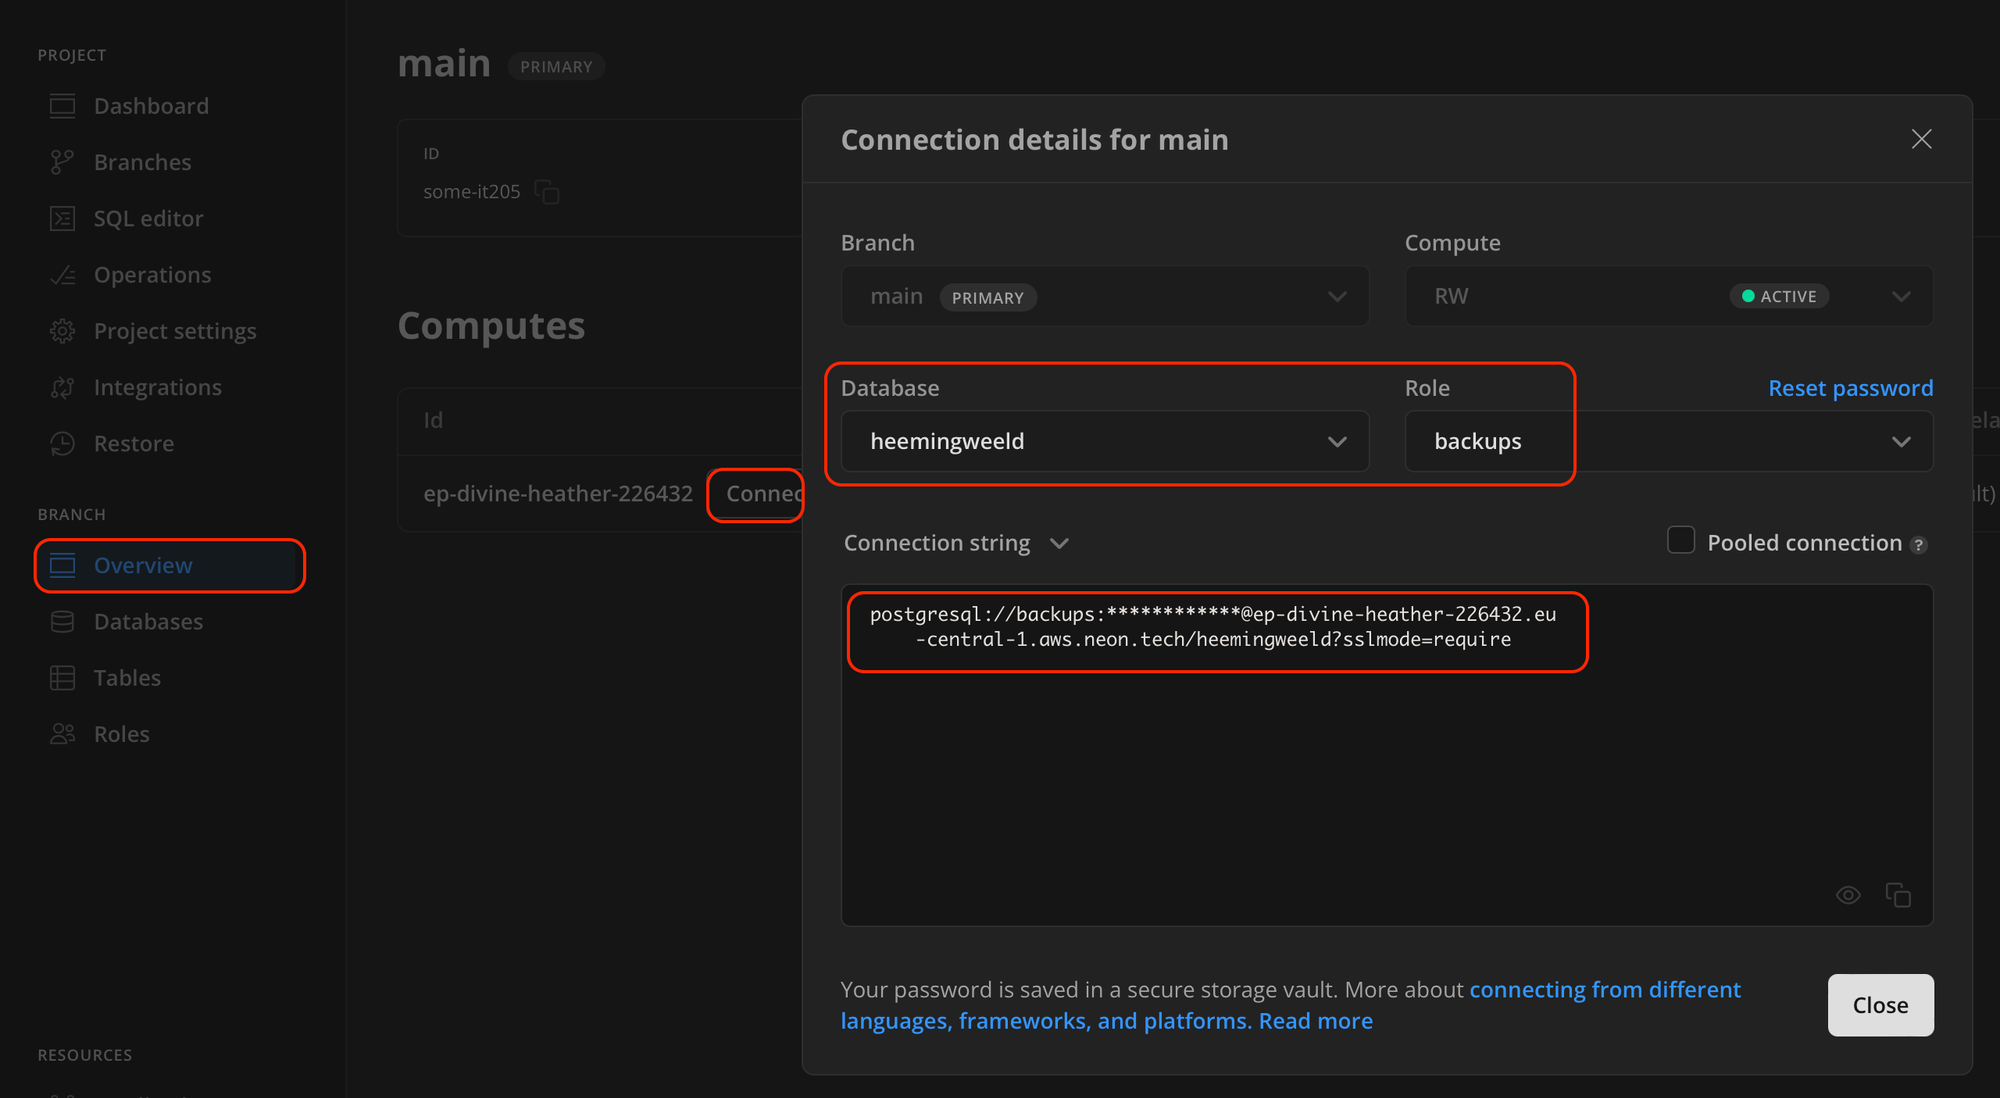
- Click on “Overview” then “Connect” or just on the Dashboard, refer to “Connection Details”
- Create a new user (or role) with RW or read-only access to the necessary database. This user will be used by SimpleBackups to connect to your database securely.
- Copy the connection string (make sure you replace the **** by the actual password)
Step 2: Whitelist SimpleBackups IP Addresses
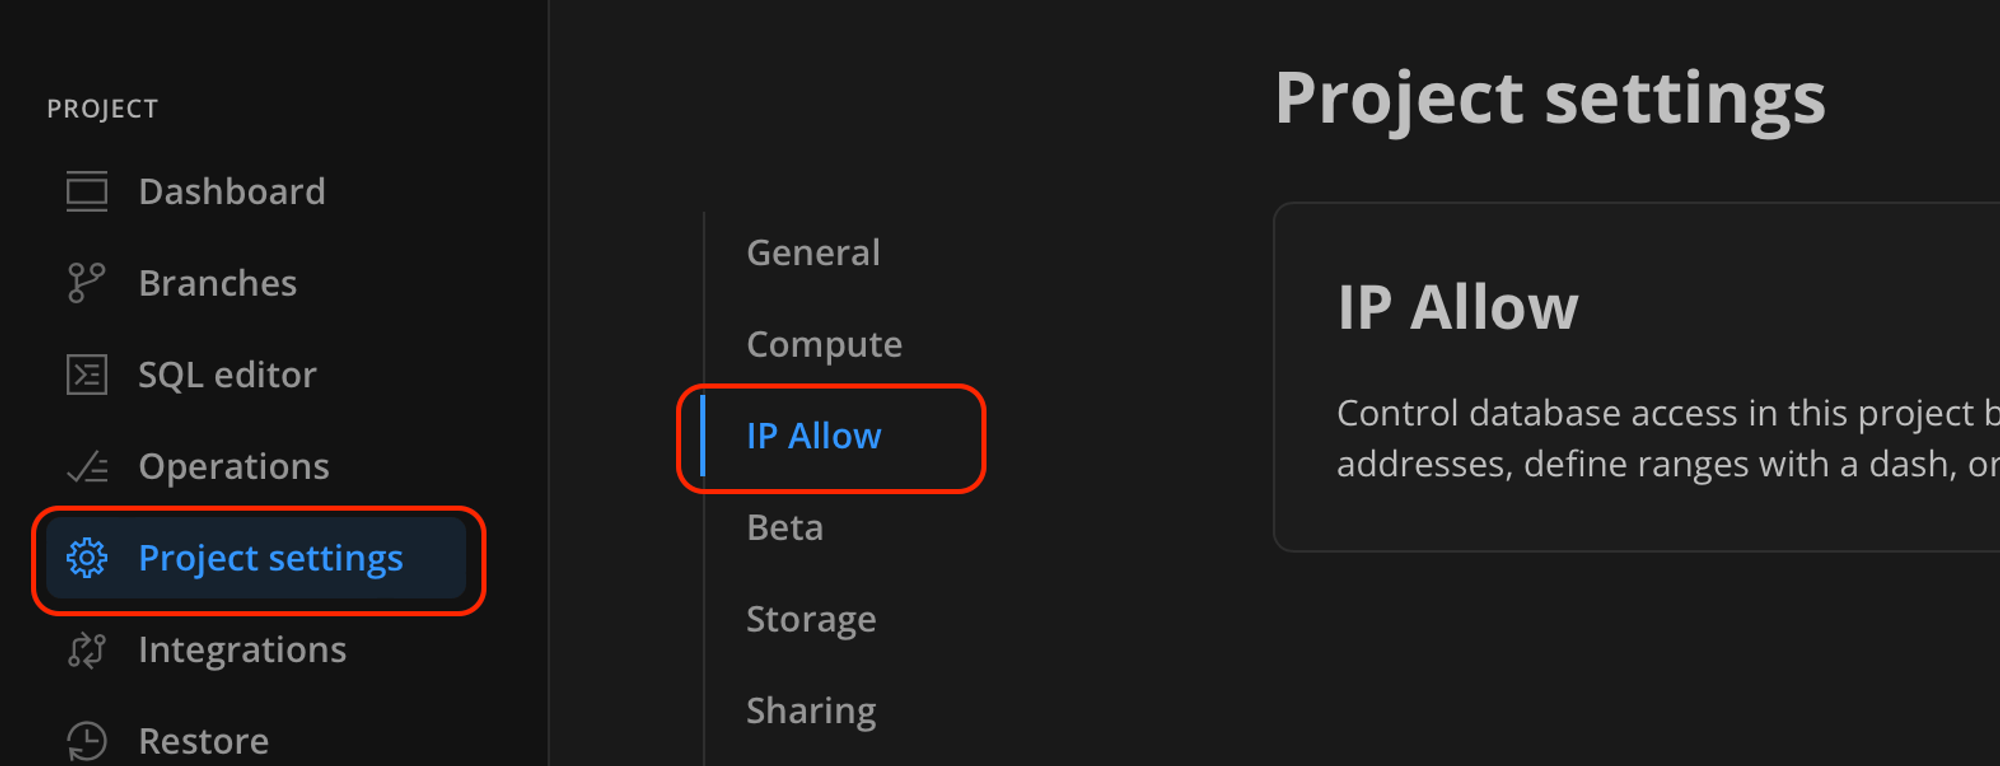
Note: if your database is behind a firewall, follow the following steps.
- In the Neon dashboard, go to the "Project settings" then "IP Allow"
- Add the IP addresses provided by SimpleBackups to the whitelist. This allows SimpleBackups to connect to your database.
Creating a New Neon Database Backup on SimpleBackups
Step 1: Create a New Database Backup on SimpleBackups
- Navigate to the "Backups" section and click on "Create Backup."
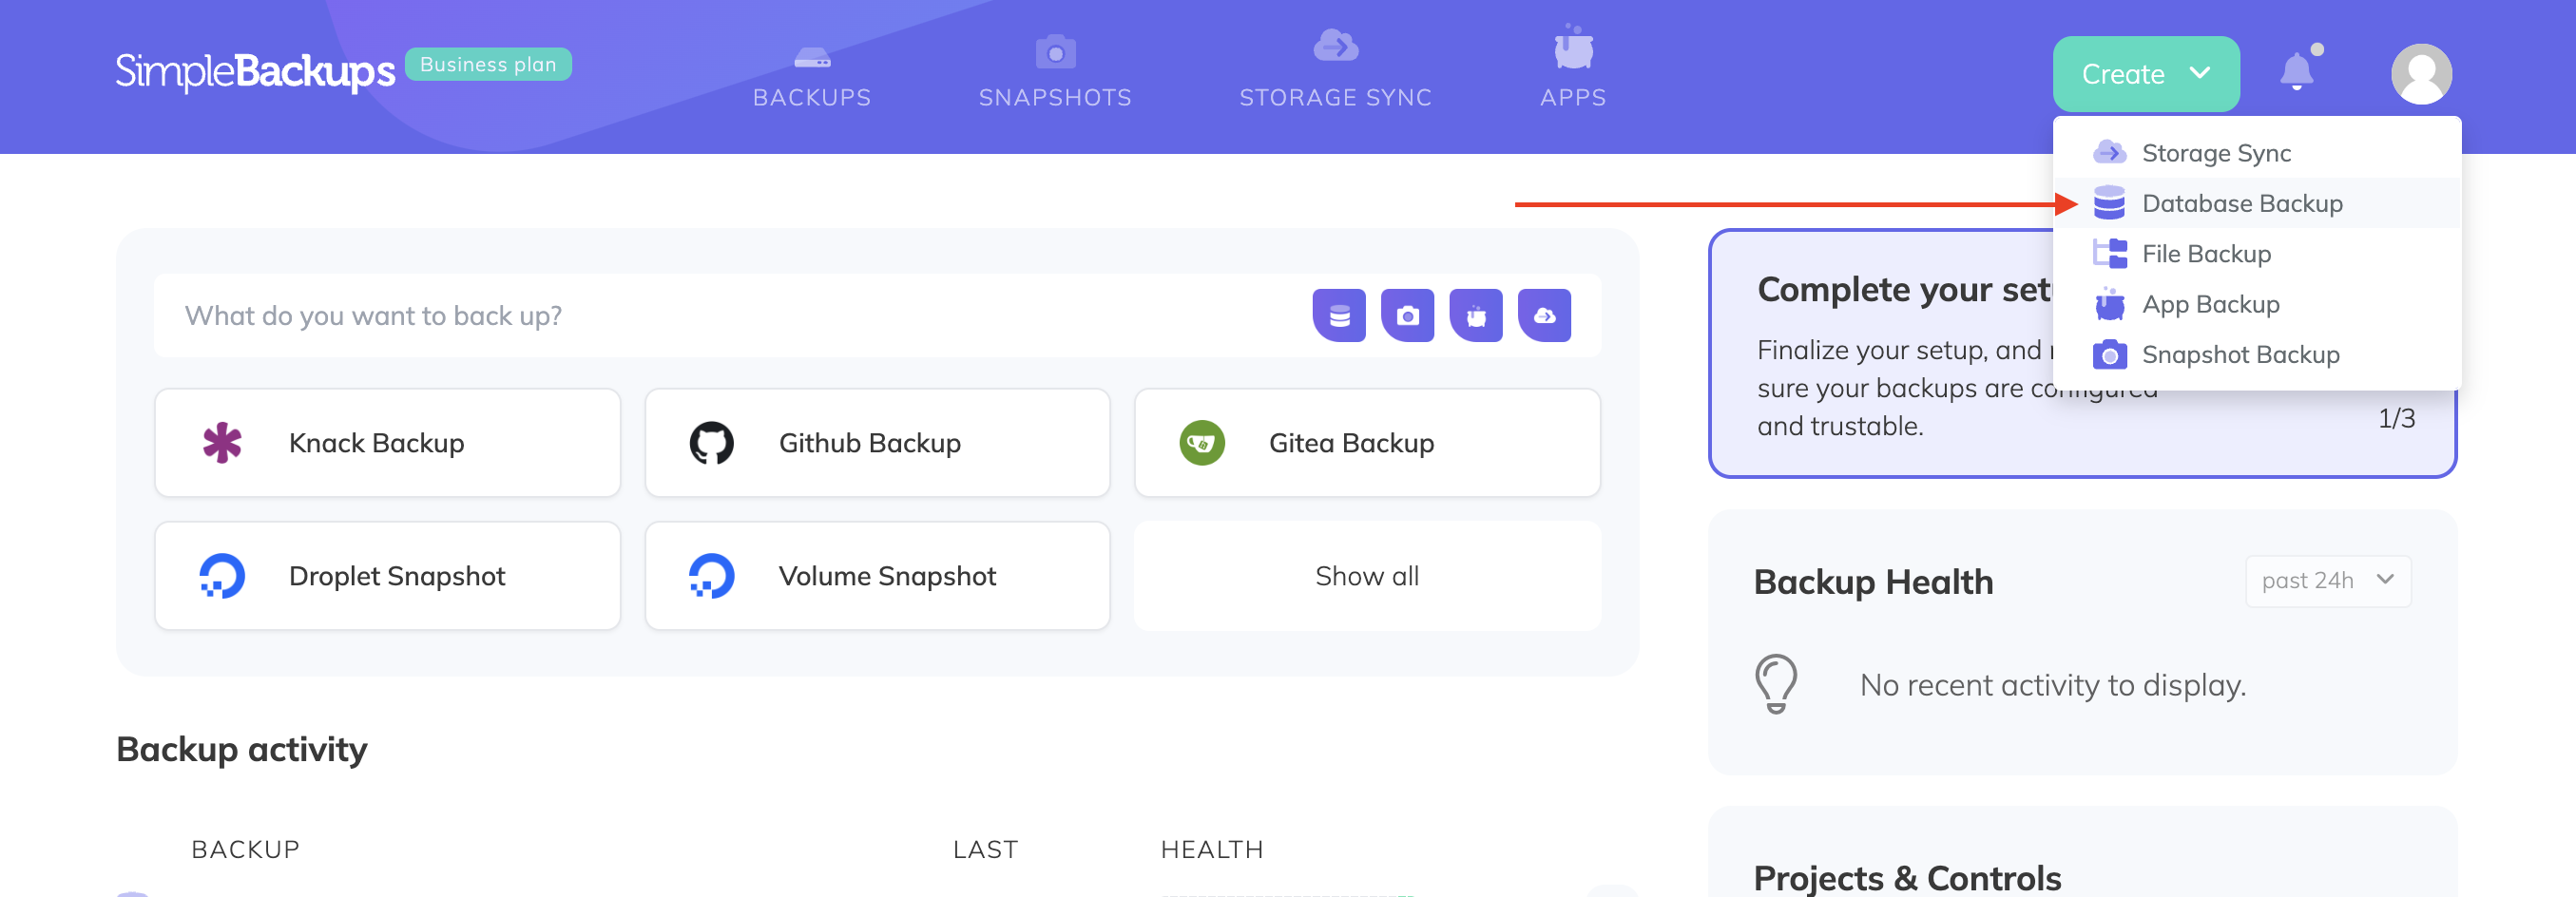
- Select "Database Backup."
- You may use your own server to dump the backups, but we recommend the “serverless” option.
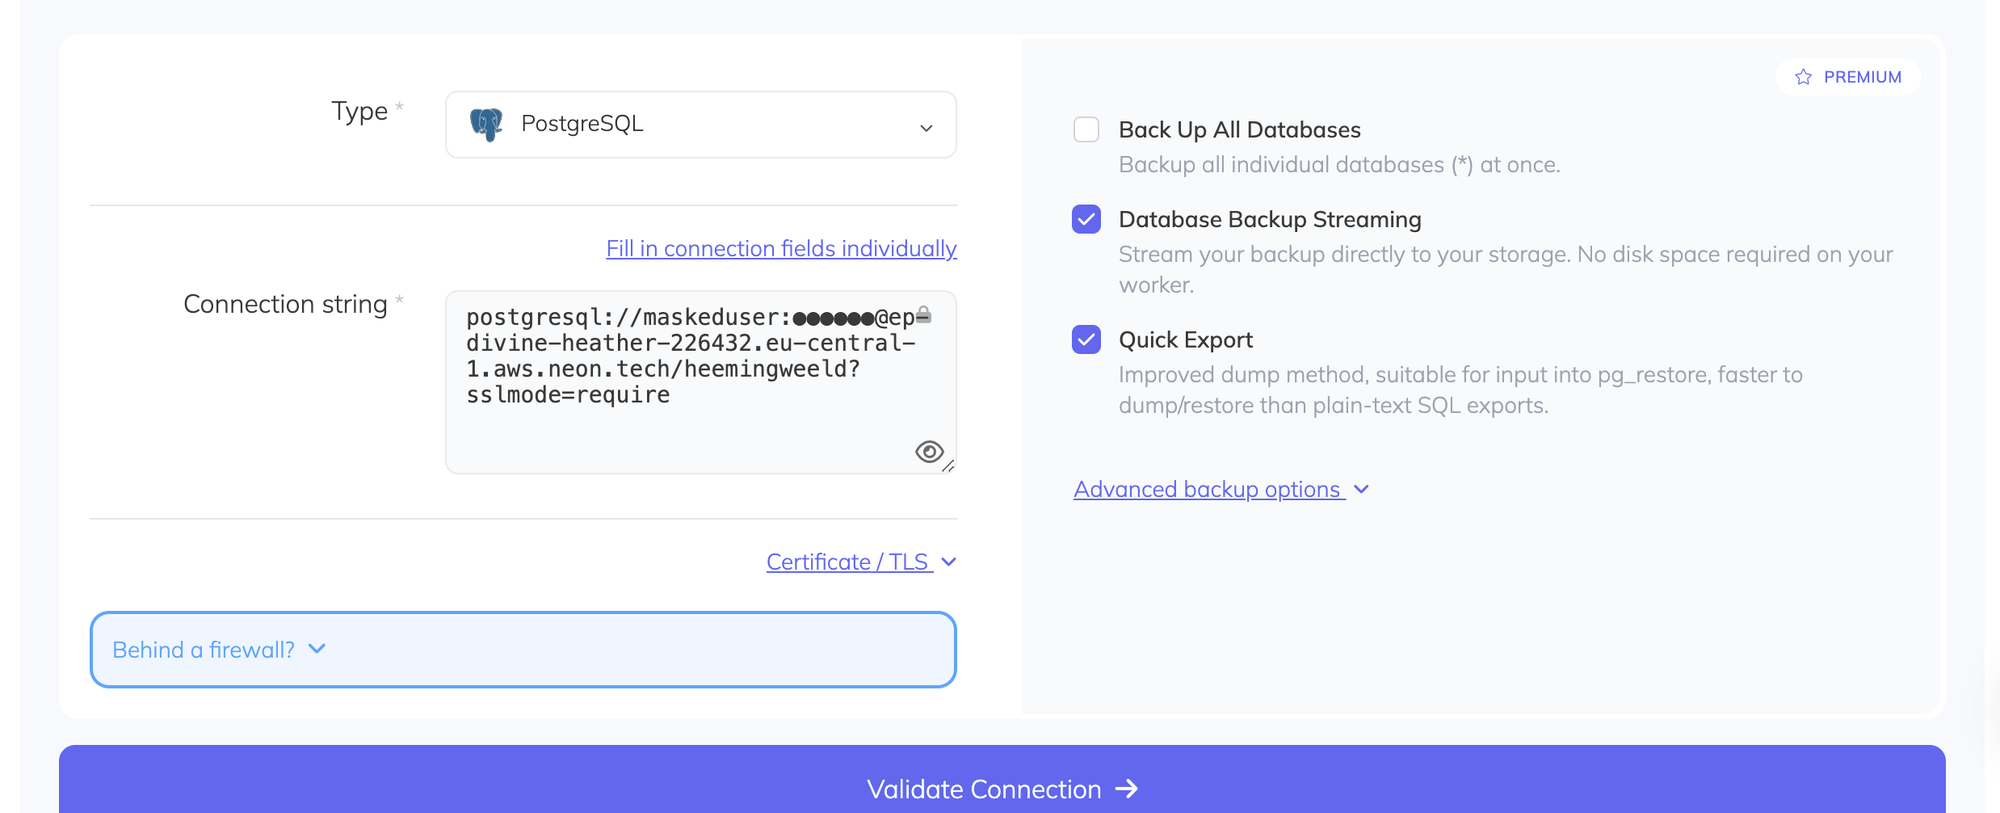
- Step 4: Configure Database Backup Settings
- Choose PostgreSQL as the database type.
- Click “Paste connection string instead”
- Fill in the complete connection string for your Neon database (make sure the password is added as well and not the asterisks *)
- Click “Validate Connection”
 `
`
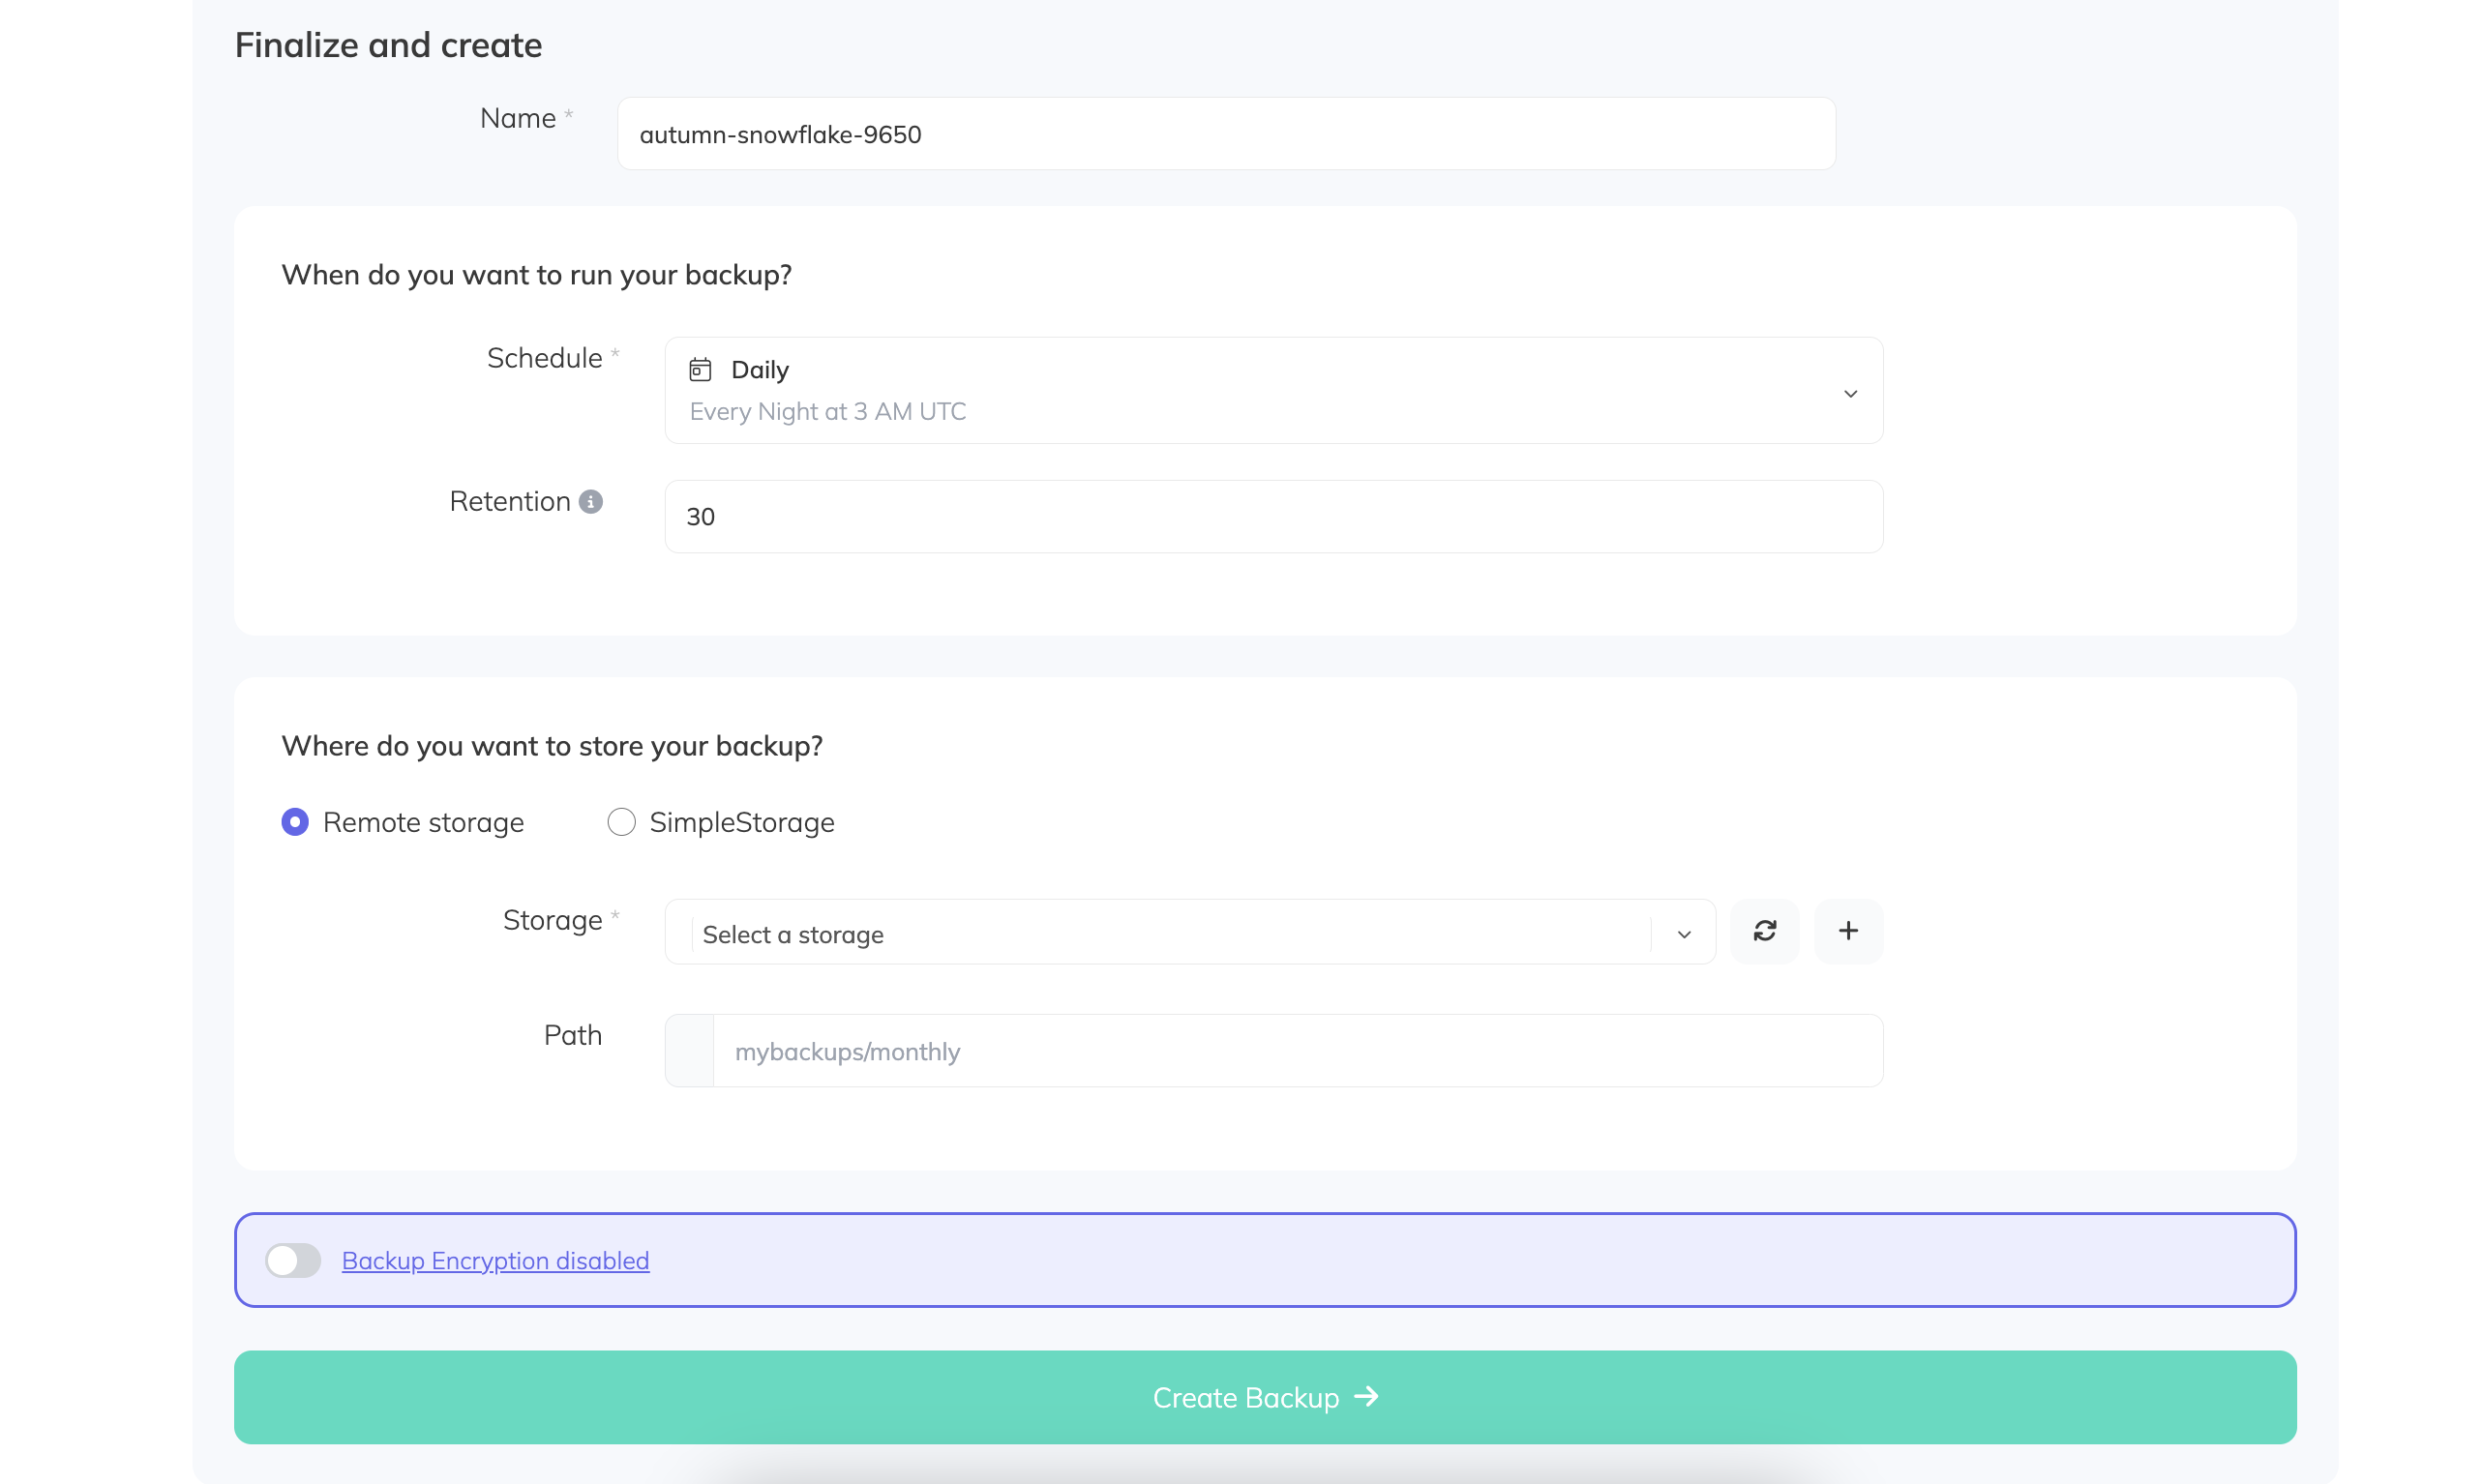
Step 2: Schedule and Customize Your Backup
Select a name for your backup name, set a Schedule and a Storage to store your backup, then click on Create backup.
Step 3: Save and Activate the Backup
- Review your backup configuration to ensure all details are correct & accurate.
- Save your backup configuration. SimpleBackups will automatically start the backup process according to your schedule.
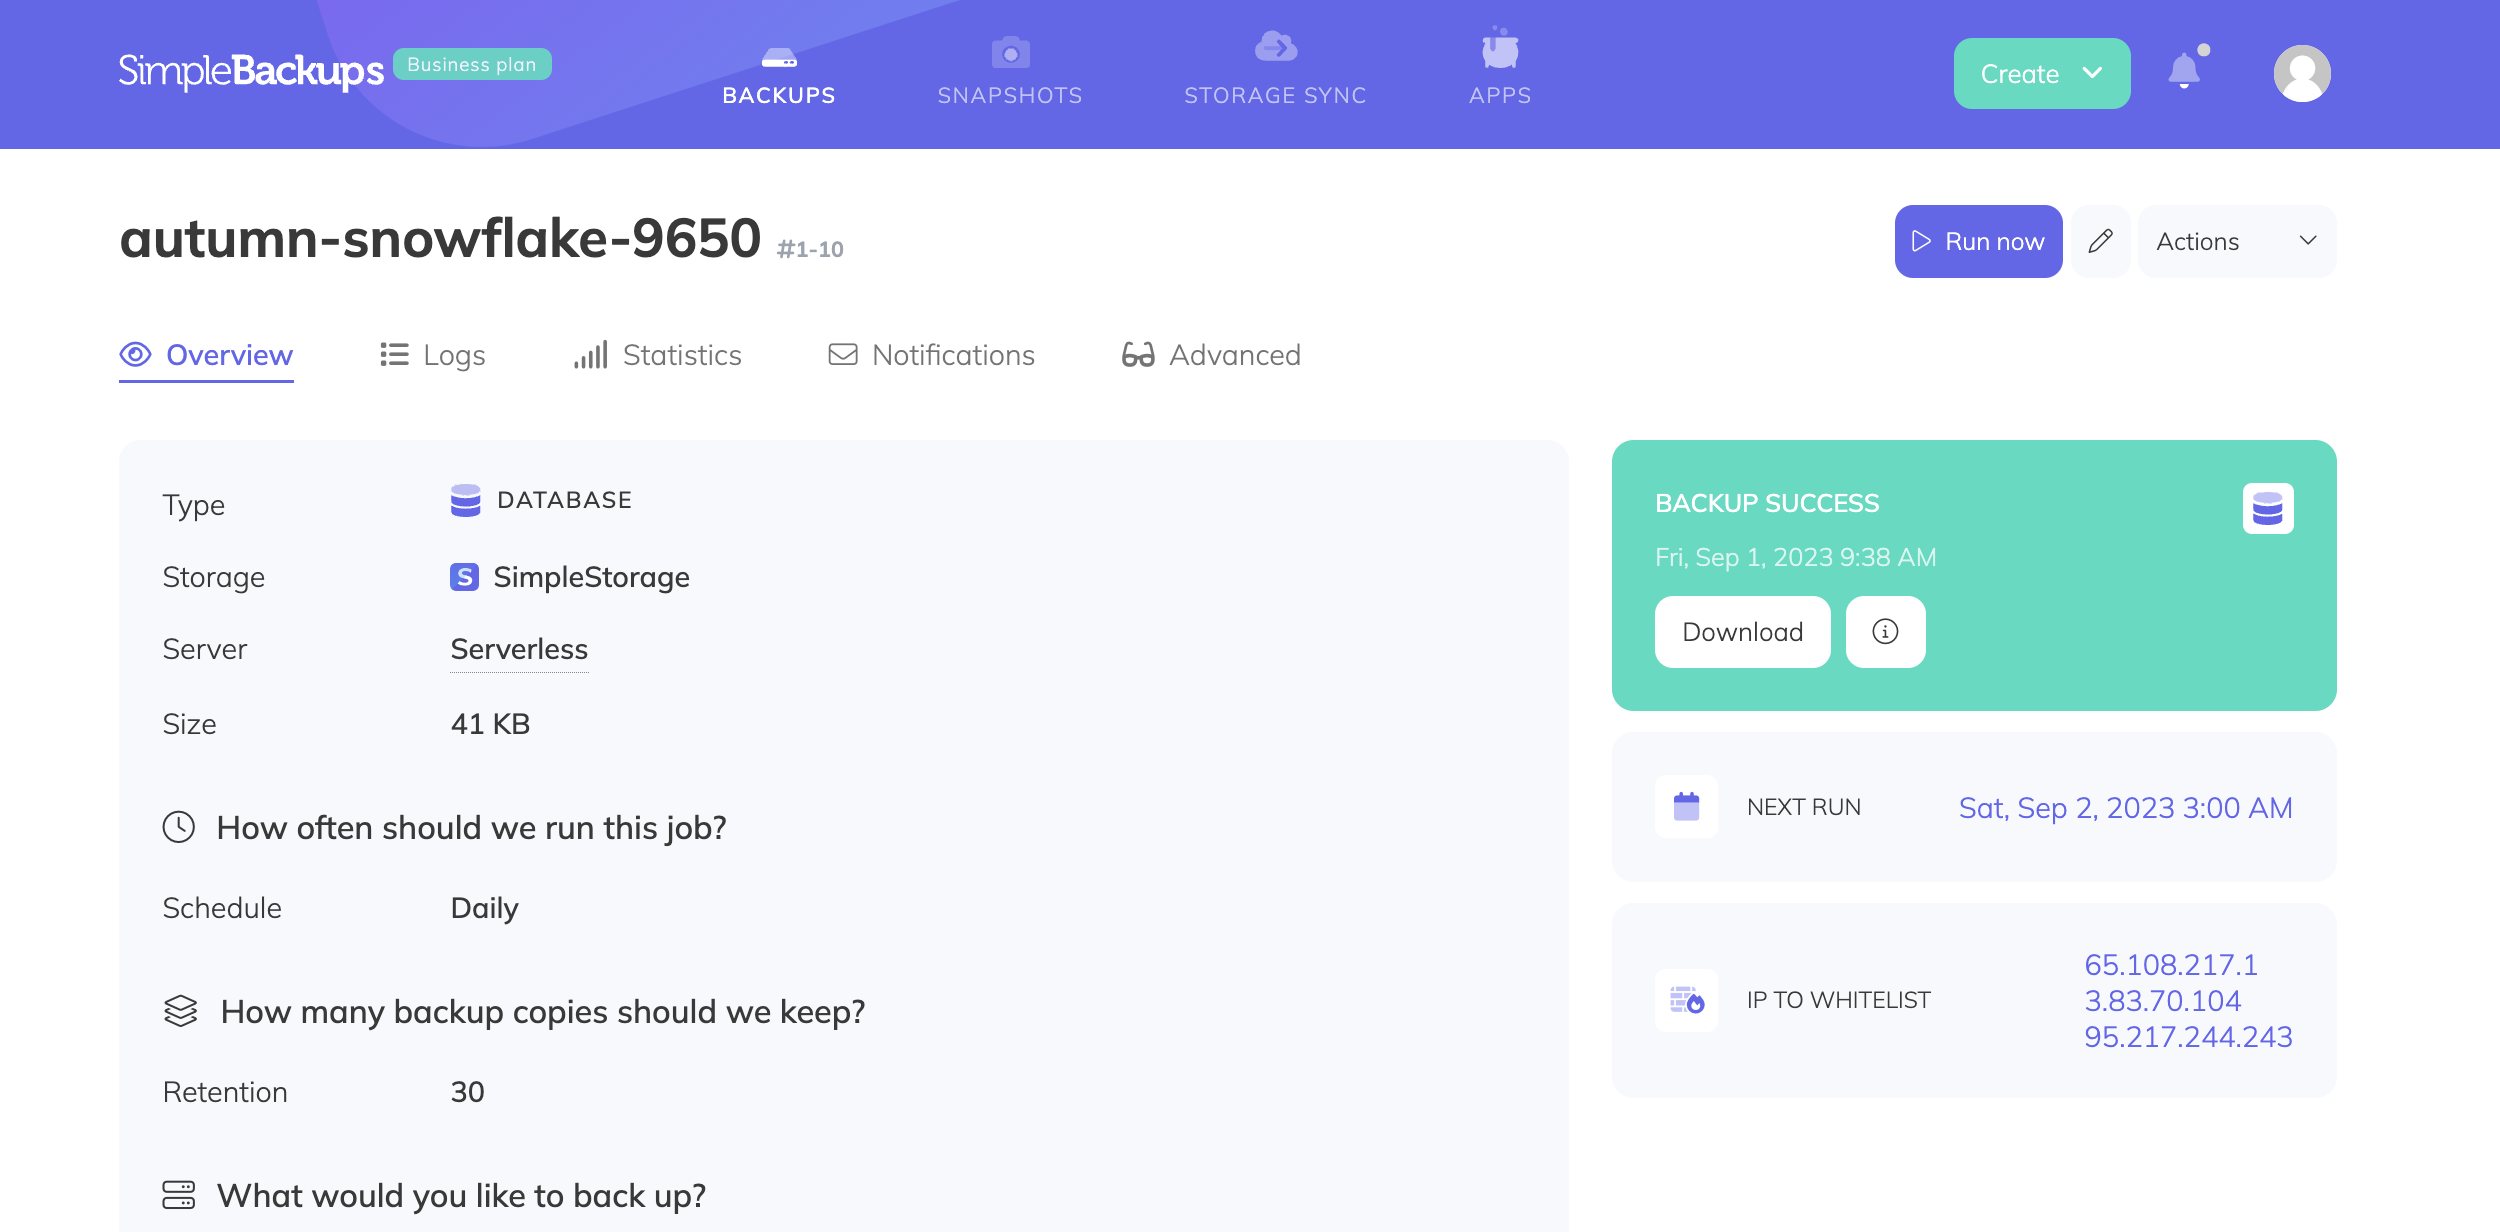
You’ll be redirected to your backup job’s page, click on Run now to test this backup, once the backup runs successfully, you’ll be able to see a Backup success indicator.
Restoring your backup
Step 1: Download the Neon Backup File
First, locate the URL of your backup from the restore tab in your desired backup log dialog, and download it to your local system:
wget 'http://example.com/path/to/your-neon-backup.tar.gz' -O backup.tar.gzStep 2: Extract the Backup File
Extract the downloaded file containing your Neon PostgreSQL backup:
tar -xzvf backup.tar.gzNavigate into the extracted directory:
cd your_backup_folderStep 3: Restore the Backup
Now that you have the backup file, you can restore it to your Neon database. You can use the pg_restore command, or the psql command to restore the backup file to your database.
Using psql:
psql -U username -d dbname < database-dump.sqlOr, using pg_restore:
pg_restore -U username -d dbname database-dump.sqlWrapping up.
Following these steps ensures a secure backup for your Neon PostgreSQL database,. This ensures that your valuable data is protected against accidental loss or corruption, giving you peace of mind and confidence in your data management strategy.
Back to blog
Stop worrying about your backups.
Focus on building amazing things!
Free 7-day trial. No credit card required.
Have a question? Need help getting started?
Get in touch via chat or at hello@simplebackups.com


